Getting Started
Steps
Follow along with the video guide!
1. Install the Toolchain
The "toolchain" is a combination of command line tools that are used within the Daisy ecosystem for building, flashing, and debugging firmware.
Follow the instructions below for installing the toolchain on your operating system:
2. Get the Source
Clone the DaisyExamples repository by pasting the following command into a terminal application:
git clone --recurse-submodules https://github.com/electro-smith/DaisyExamples ~/Desktop/DaisyExamples
Make sure to use the --recurse-submodules flag in order to activate the libDaisy and DaisySP libs which are embedded into the examples repo as submodules.
3. VS Code
3a. Installation
Download and install the latest version of VS Code.
3b. Cortex Debug Extension
This step is only necessary if you intend to debug your code with a debug probe.
To install the Cortex Debug extension in VS Code:
- Go to the extensions tab
View > Extensions. - Search for Cortex Debug.
- Find the extension by marus25 and install, it should be the top result.
3c. More Setup (Windows Only)
- Open the terminal tab in the bottom of your VS Code window if not visible (Terminal -> New Terminal).
- There should be a + button with a dropdown menu in the top right of the terminal window.
- In that dropdown select
Select Default Profile, then choose Git Bash. - Make sure to reset your USB driver before proceeding. Full instructions are on our Zadig tutorial page.

If the git-bash terminal is not being used, you may get an error:
If so, you can change your terminal to git-bash, or create the build/ folder manually.
4. Run the Blink Example
Now that we have a functioning build environment, let's run a "Blink" example on Daisy. A Blink program is the "Hello, World" of embedded programming and consists of toggling the state of an onboard LED.
There are two common ways to do this:
4a. Flashing Daisy via USB


- Open the Blink example's folder in VS Code by clicking
File > Open Folder, then navigating to~/Desktop/DaisyExamples/seed/Blink. - Connect Daisy Seed via USB.
- Put Daisy into bootloader mode by holding the BOOT button down, and then pressing the RESET button. Once you release the RESET button, you can also let go of the BOOT button. This sequence is demonstrated above.
- If this is a new install, or you have upgraded DaisyExamples, DaisySP, or libDaisy:
- Launch the command palette with Ctrl+P on Windows or Cmd+P on macOS.
- Type
task build_all. This will build the libraries, and the current example. - This step only has to be done on a new install, or when the source code has been updated inside of one of the libraries.
- Launch the command palette with Ctrl+P on Windows or Cmd+P on macOS.
- Run
task build_and_program_dfu.
This will build the example, and then flash to Daisy via dfu-util.
Daisy Seed's onboard red LED should be blinking.
In VS Code's Terminal, you'll see the following "errors" even though you succeeded in making the onboard LED blink. This message is normal and can be ignored in general.
4b. Flashing to Daisy via Debug probe
Connect the Debug Probe
We recommend using the ST-link V3 mini [Mouser] [DigiKey] as your debug probe.
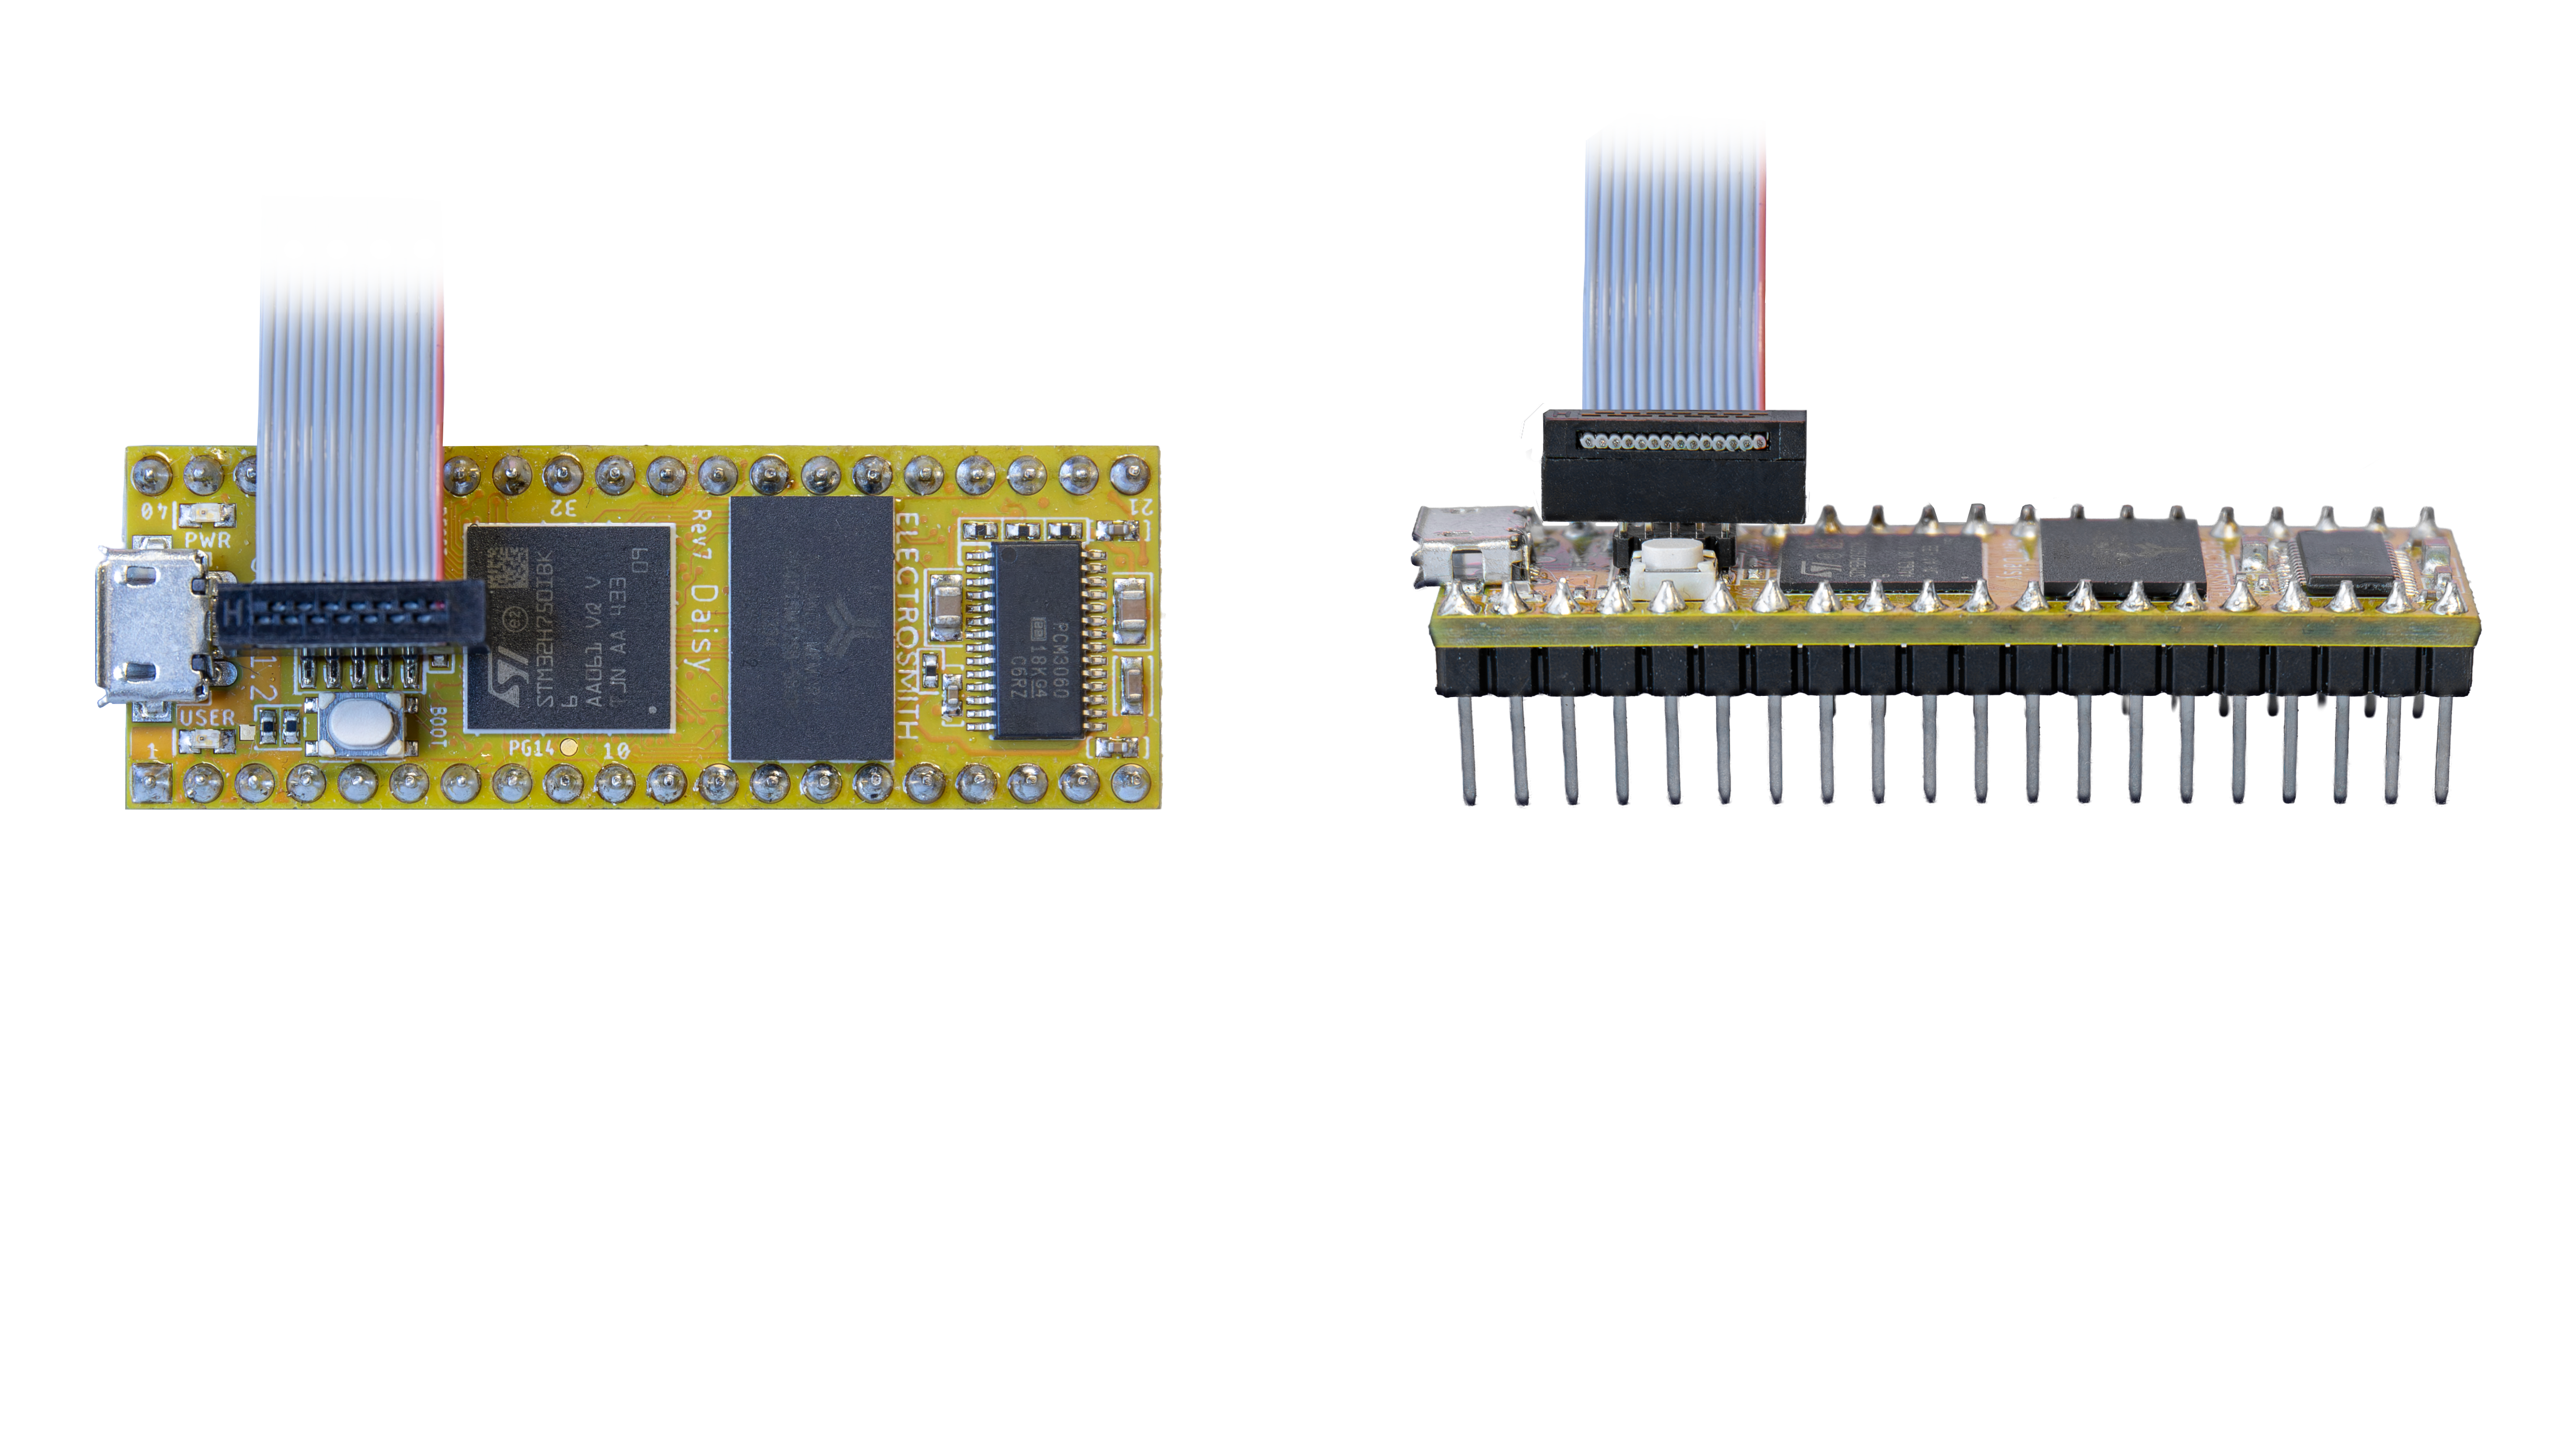
- Connect the debug probe to Daisy Seed as indicated above, making sure the red stripe is facing the correct direction.
- Power the device as usual.
Make sure to center the debug probe on Daisy's headers so that there are an even number of pins on either side of the connector.

Flash the Example
- Open VS Code.
- Open the Blink example's folder by clicking
File > Open Folder, then navigating to~/Desktop/DaisyExamples/seed/Blink. - If this is a new install, or you have upgraded DaisyExamples, DaisySP, or libDaisy:
- Launch the command palette with Ctrl+P on Windows or Cmd+P on macOS.
- Run
task build_all. This will build the libraries. - This step only has to be done on a new install, or when the source code has been updated.
- Launch the command palette with Ctrl+P on Windows or Cmd+P on macOS.
- Run
task build_and_program.
This will build all libraries, build your example, and flash to Daisy via the debug probe. Daisy Seed's onboard red LED should be blinking.
To make your own Daisy project, checkout the Create a New Project tutorial page.
5. Debugging
To debug your Daisy code:
- Open the folder of the example you would like to debug as explained above.
- Attach your Daisy to the debug probe.
- Press F5 to enter debug mode, and flash your Daisy.
- VS Code will launch into the debugger, and halt at the default breakpoint.
- Press the continue arrow in the small debug menu to continue running the example.
Under the hood, this command builds all libraries, builds your example, flashes via openocd, then connects the debug environment.
Refer to this tutorial for a good intro to debugging in VS Code. While this tutorial is for debugging Node.js, the same principals apply.
6. Troubleshooting
Please refer to the Troubleshooting Page.